
Private Container Communication in Azure Container Apps
Learn the basics of private containers communication with Azure Container Apps

Today I am going to show you how you can deploy containers to Azure Container Apps (ACA) that can communicate with each other privately using Bicep.
Most of the tutorials out there concentrate on building and deploying public containers that can be accessed from everyone over the internet. This approach, however, is not ideal and is rarely used in real production environments.
That’s why today I will show you how you can deploy two containers, one accessible from the internet (the web app UI) and another one that’s only accessible by the first container (the backend).
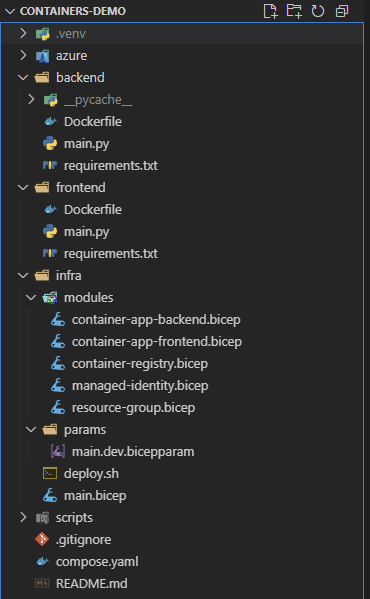
Keep in mind that this is not a full-blown tutorial. You should clone the repo and study it on your own. You can find the source code of my demo here: kaldren/acr-private-demo
What is Azure Container Apps
Azure Container Apps is a serverless platform for deploying and running containers. It is built on top of Kubernetes, and it abstracts away most of its complexity for you. Basically, things like scaling, container orchestration, configuration and server updates are all done for you by Azure.
Bicep
For this demo I’ve decided to use Bicep to deploy my infrastructure. You can check the source code for a more detailed walkthrough.
Container Communication in Azure Container Apps
There are a few ways for containers to talk to each other in ACA.
Default fully qualified domain name (FQDN)
A custom domain name
The container app name, for instance
http://<APP_NAME>for internal requestsA Dapr URL
Today I will show you how the third option above, connecting via the app name for internal requests.
Let’s take a look at the bicep files now.
Repo Walkthrough
Azure Container Registry
First, to be able to deploy containers in Azure via ACA you need to have Azure Container Registry (ACR). This service can build and store your container images. Once the image is in the ACR your Container App can pull from it and use the image to build and deploy a container instance.
@description(’Name of the Container Registry’)
param containerRegistryName string

resource containerRegistry ‘Microsoft.ContainerRegistry/registries@2025-05-01-preview’ = {
  name: containerRegistryName
  location: resourceGroup().location
  identity: {
    type: ‘SystemAssigned’
  }
  sku: {
    name: ‘Basic’
  }
  properties: {
    adminUserEnabled: true
  }
}

output containerRegistry object = {
  name: containerRegistry.name
  endpoint: containerRegistry.properties.loginServer
}
Managed Identity
Once we deploy the ACR we need to create another resource - a Managed identity. We will then assign the role AcrPull to it for the ACR that we created above. This will allow it to pull container images from the registry. We will then assign this identity to our container apps which would allow them to pull the images from the registry themselves.
param containerRegistryName string

resource managedIdentity ‘Microsoft.ManagedIdentity/userAssignedIdentities@2025-01-31-preview’ = {
  location: resourceGroup().location
  name: ‘mi-containerapp’
}

// Set ArcPull role assignment for the managed identity on the ACR
resource acrPull ‘Microsoft.Authorization/roleAssignments@2022-04-01’ = {
  name: guid(managedIdentity.id, ‘AcrPull’)
  scope: containerRegistry
  properties: {
    roleDefinitionId: subscriptionResourceId(
      ‘Microsoft.Authorization/roleDefinitions’,
      ‘7f951dda-4ed3-4680-a7ca-43fe172d538d’ // AcrPull role ID
    )
    principalId: managedIdentity.properties.principalId
    principalType: ‘ServicePrincipal’
  }
}

output managedIdentityId string = managedIdentity.id

resource containerRegistry ‘Microsoft.ContainerRegistry/registries@2025-05-01-preview’ existing = {
  name: containerRegistryName
}
Azure Container Apps
We will deploy two containers - one for the frontend and one for the backend.
param location string = resourceGroup().location
param containerAppEnvironmentName string
param containerAppName string
param containerRegistryName string
param imageName string
param imageTag string
resource containerAppEnvironment ‘Microsoft.App/managedEnvironments@2025-02-02-preview’ = {
name: containerAppEnvironmentName
location: location
properties: {}
}
resource containerApp ‘Microsoft.App/containerApps@2022-03-01’ ={
name: containerAppName
location: location
identity: {
type: ‘SystemAssigned, UserAssigned’
userAssignedIdentities: {
‘${managedIdentity.id}’: {}
}
}
properties:{
managedEnvironmentId: containerAppEnvironment.id
configuration: {
ingress: {
targetPort: 9696
external: true
}
registries: [
{
server: ‘${containerRegistry.name}.azurecr.io’
identity: managedIdentity.id
}
]
}
template: {
containers: [
{
image: ‘${containerRegistry.name}.azurecr.io/${imageName}:${imageTag}’
name: imageName
}
]
}
}
}
resource containerRegistry ‘Microsoft.ContainerRegistry/registries@2025-05-01-preview’ existing = {
name: containerRegistryName
}
resource managedIdentity ‘Microsoft.ManagedIdentity/userAssignedIdentities@2025-01-31-preview’ existing = {
name: ‘mi-containerapp’
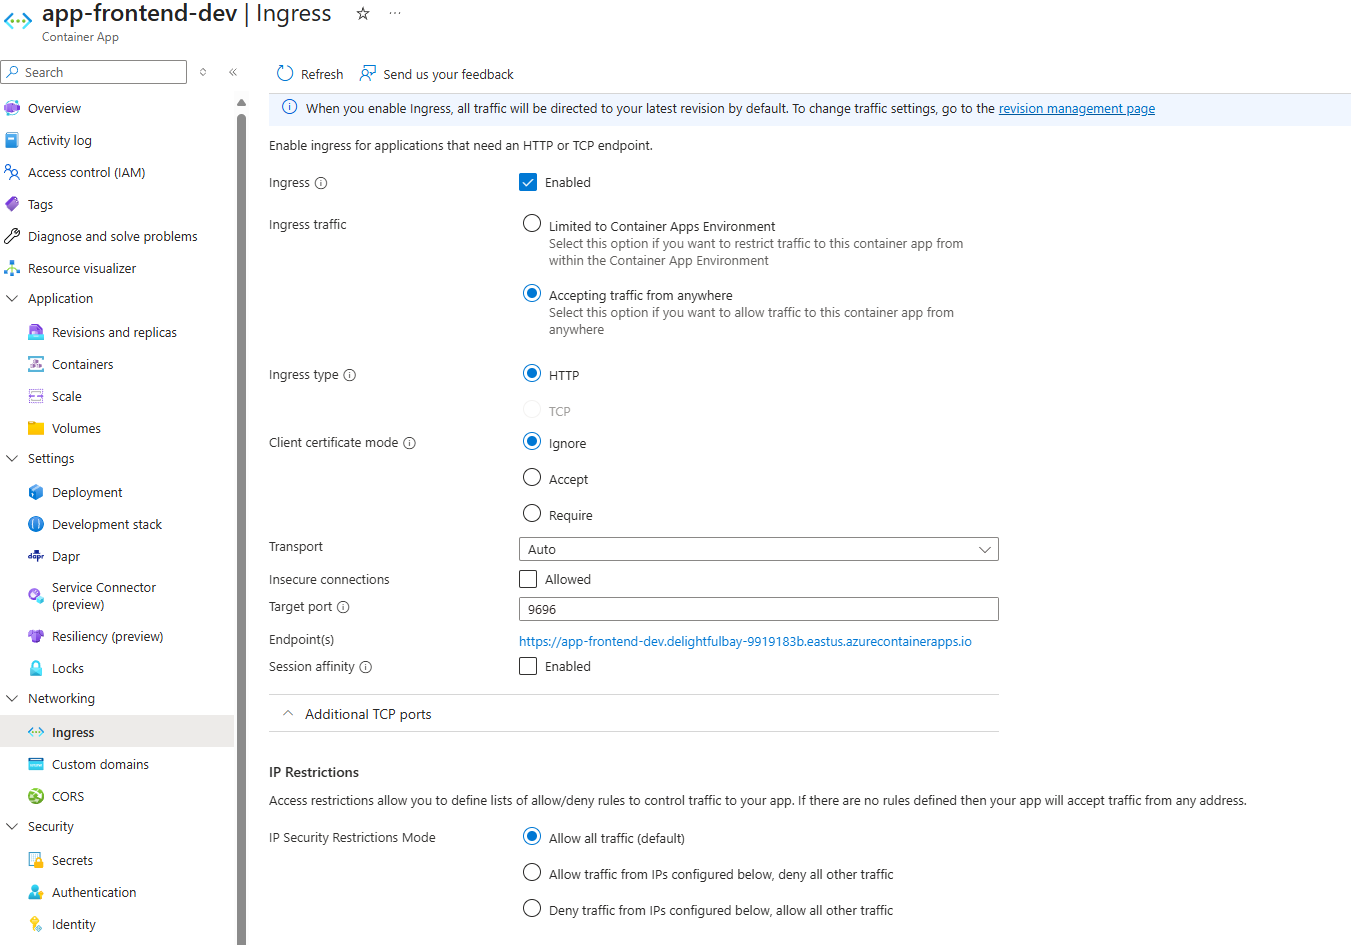
}The most important sections (in bold) to note are:
identity section: Here we assign the managed identity created above to the app
registry section: We use the identity to authenticate with the ACR
ingress section: We allow incoming external requests (from the internet) because the web app needs to be accessible from everyone
Here’s the deployed frontend container app.
Now, let’s take a look at the backend container app.
param location string = resourceGroup().location
param containerAppEnvironmentName string
param containerAppName string
param containerRegistryName string
param imageName string
param imageTag string
resource containerAppEnvironment ‘Microsoft.App/managedEnvironments@2025-02-02-preview’ = {
name: containerAppEnvironmentName
location: location
properties: {}
}
resource containerApp ‘Microsoft.App/containerApps@2022-03-01’ ={
name: containerAppName
location: location
identity: {
type: ‘SystemAssigned, UserAssigned’
userAssignedIdentities: {
‘${managedIdentity.id}’: {}
}
}
properties:{
managedEnvironmentId: containerAppEnvironment.id
configuration: {
ingress: {
targetPort: 8686
external: false
}
registries: [
{
server: ‘${containerRegistry.name}.azurecr.io’
identity: managedIdentity.id
}
]
}
template: {
containers: [
{
image: ‘${containerRegistry.name}.azurecr.io/${imageName}:${imageTag}’
name: imageName
}
]
}
}
}
resource containerRegistry ‘Microsoft.ContainerRegistry/registries@2025-05-01-preview’ existing = {
name: containerRegistryName
}
resource managedIdentity ‘Microsoft.ManagedIdentity/userAssignedIdentities@2025-01-31-preview’ existing = {
name: ‘mi-containerapp’
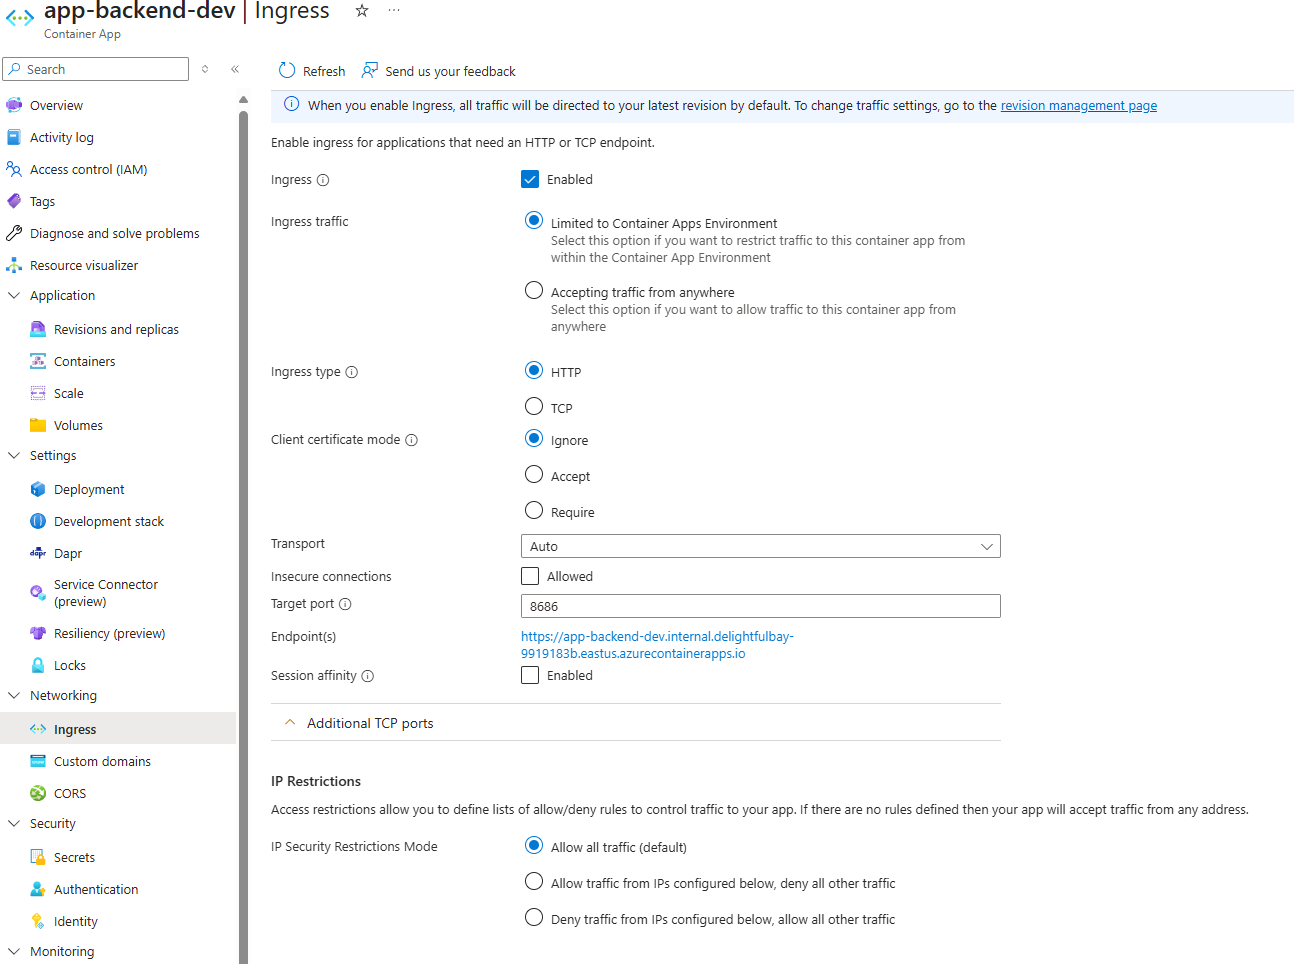
}The only difference here is the external ingress is set to false. That’s because we don’t want this container to be accessible from the internet but only from the network inside the Azure Container App Environment.
Here’s how the backend container app looks like.
main.bicep
Here we add all bicep files as modules. For example:
module acr ‘modules/container-registry.bicep’ = {
  name: ‘acr-${randomSuffix}’
  params: {
    containerRegistryName: containerRegistryName
  }
  dependsOn: [
    rg
  ]
  scope: resourceGroup(resourceGroupName)
}
(Check the repo for the full file content)
deploy.sh
I’ve written a shell script that does the deployment for me. Here’s part of it.
# az login -- Might need to login first. Uncomment if needed.

az deployment sub create \
  --name rgDeployment \
  --location eastus \
  --parameters params/main.dev.bicepparam deployContainerApp=false

# # Login to ACR
ACR_LOGIN_SERVER=$(az acr show -n $ACR_NAME --query loginServer -o tsv)
az acr build --registry $ACR_NAME \
  --image $BACKEND_IMAGE:$BACKEND_TAG \
  --file ../backend/Dockerfile ../backend

ACR_LOGIN_SERVER=$(az acr show -n $ACR_NAME --query loginServer -o tsv)
az acr build --registry $ACR_NAME \
  --image $FRONTEND_IMAGE:$FRONTEND_TAG \
  --file ../frontend/Dockerfile ../frontend

az deployment sub create \
  --name rgDeployment \
  --location eastus \
  --parameters params/main.dev.bicepparam deployContainerApp=true
What this does is it is first deploying the ACR and managed identity resources without the container apps (see the deployContainerApp is set to false). That’s because I want to build and deploy the images for the frontend and backend first, so they are available for when we start deploying the container apps.
Dockerfile
Nothing fancy here. We just set the version to Python 3.13, install requirements.txt and run the apps on ports 8686 and 9696.
FROM python:3.13
WORKDIR /app
ENV HELLO_MESSAGE=”Hello from the backend!”
COPY requirements.txt .
RUN pip install --no-cache-dir -r requirements.txt
COPY . .
EXPOSE 8686
CMD [”uvicorn”, “main:app”, “--host”, “0.0.0.0”, “--port”, “8686”]
FROM python:3.13
WORKDIR /app
COPY requirements.txt .
RUN pip install --no-cache-dir -r requirements.txt
COPY . .
EXPOSE 9696
# Run streamlit app on container’s port 9696
CMD [”streamlit”, “run”, “main.py”, “--server.port=9696”, “--server.address=0.0.0.0”]compose.yaml
This one I used for local development and testing.
Talking Containers
Let’s take a quick look at the frontend code to see how, once we deploy the infrastructure, we are able to connect to the backend container via the private network and not the public internet.
import streamlit as st
import requests

st.title(”Container Demo UI”)
st.text(”This text will change if the backend is called successfully.”)

API_URL = “http://app-backend-dev”

def call_hi_get():
    try:
        response = requests.get(f”{API_URL}/hi”)
        if response.status_code == 200:
            st.text(response.json().get(”message”, “No message in response”))
    except requests.RequestException as e:
        st.text(f”Error reaching backend: {e}”)

if st.button(”Call /hi endpoint!”):
    response = call_hi_get()
Here we’re using the app name, which in this case is app-backend-dev. We’re not using any FQDNs or FQDNs with internal in their url (e.g. https://app-frontend-dev.internal.alabala-xxx.eastus.azurecontainerapps.io) - I’ve seen this approach presented by folks, but I really, really hate it, because it is ugly and it requires you to figure out the actual FQDN first.
This approach is much cleaner - it relies on the service discovery system of ACA, which is much cleaner solution. We don’t have to care what the FQDN is.
Azure
Here’s our infrastructure in Azure.

If you want to learn more, then clone the repo, take a look and try it on your own.
Thanks.