
Run Your .NET 8 API in a Docker Container (BEGINNER)
Learn How to Run Your .NET 8 API in Docker on localhost

In this post, we'll be creating an API in .NET 8 using the command-line interface (CLI). We'll also demonstrate how easy it is to run the API inside a Docker container and access it locally on your machine.
I’ve also created a short, 47 seconds video walkthrough of the whole process here:
Prerequisites
Before we begin, ensure that you have the following dependencies installed:
Step 1: Create a New API Project with Docker Support
To create an API project in .NET 8, open your terminal or command prompt and run the following command:
dotnet new webapi -n WeatherAPIThis command creates a new API project named WeatherAPI. Now we need to add docker support and for that open your project in Visual Studio, right-click on it and then go to Add / Docker Support…

Depending on your system configuration you’ll have default settings provided here. Leave everything as is.

Step 2: Build and Run the API Locally
Before running the API inside a Docker container, let's verify that it works locally by either building it inside Visual Studio or via the cli:
cd WeatherAPI
dotnet build
Given that it’s a brand new project we shouldn’t have any issues building and running it. Now it’s time to create a docker image so that we can run our app in a container on Docker.
Step 3: Build the Docker Image
With the API project created and working locally, the next step is to build a Docker image. From within the project folder run the following command:
docker build -t weatherapi:1.0.0 .Here’s what all these params are doing:
docker build: The command to build a Docker image from aDockerfile.-t weatherapi:1.0.0: Tags the image with the nameweatherapiand version1.0.0..: Specifies the current directory as the build context.
If everything went well you should now have a working image of your API. To check it run the following command:
docker images
Step 3: Dockerfile Expose Port
Before we go into the step where we create the container out of the image we’ve just created, let’s take a quick look at the Dockerfile.
There's one thing that we need to be aware of for the next step, and that's the EXPOSE port, which is used to define the port on which the application inside the container listens, allowing Docker to map it to a port on your host machine when running the container.
FROM mcr.microsoft.com/dotnet/aspnet:8.0 AS base
USER app
WORKDIR /app
EXPOSE 8080

... the rest of the Dockerfile continues...
As we can see in our case the port is 8080, so now with that knowledge we can continue with creating the actual container.
Step 4: Run the Docker Container
Now that you have your Docker image and you know the port of the container, you can run your API in a Docker container using the following cli command:
docker run -p 5000:8080 weatherapi:1.0.0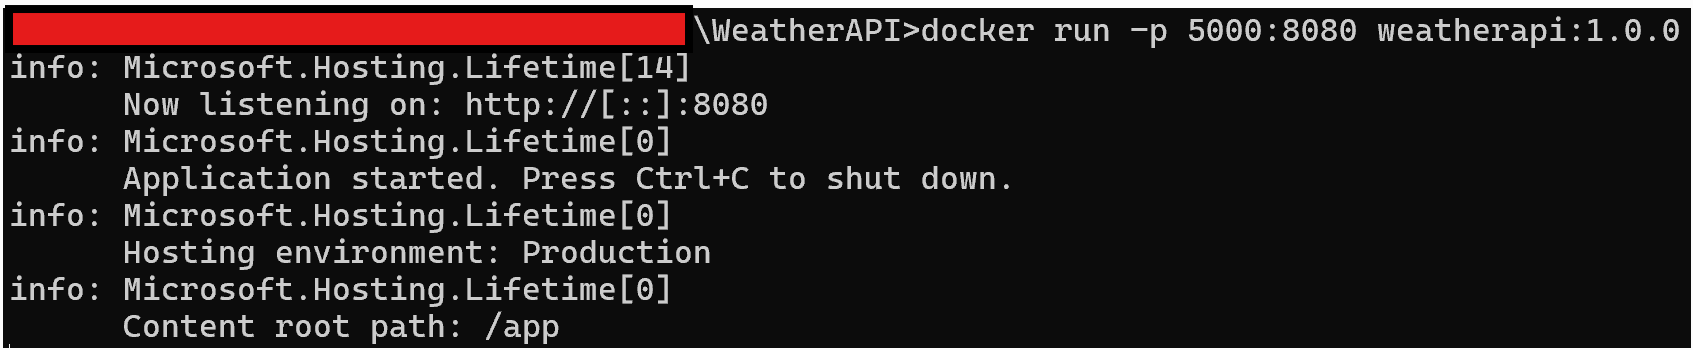
Here's what this command does:
-p 5000:8080maps port 5000 on your host machine to port 8080 inside the Docker container.weatherapi:1.0.0specifies the Docker image to run.
This option attaches your terminal to the process. If you want to run the docker container in detached mode then add the -d argument:

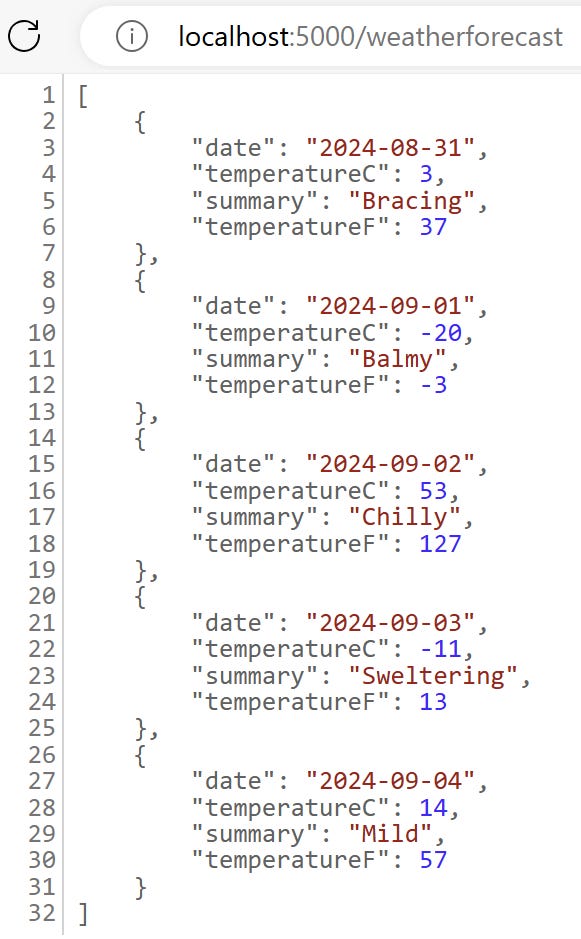
So now when you run the container, you can access the application by navigating to http://localhost:5000/weatherforecast on your machine, which routes the traffic to port 8080 inside the container where the application is running.
Conclusion
In this short walkthrough, we took a look at how easy and straightforward it is to create an API in .NET 8 and containerize it using Docker. By following these steps, you can quickly create, build, and run your projects inside a Docker container, which is an excellent way to ensure consistent environments between development, testing, and production.
My team and I work with APIs daily, and EchoAPI for VSCode is by far the easiest tool for testing. Its features are intuitive, and even our new hires pick it up quickly.