
Secure your ASP.NET Core API with JWT Authentication
Learn how to implement JWT authentication with ASP.NET Core API

In this blog post, we'll walk through the process of setting up JWT (JSON Web Token) authentication in an ASP.NET Core API. We'll cover everything from creating a new project to securing endpoints with JWT tokens.
Prerequisites
Before we begin, ensure you have the following installed:
.NET 8
Visual Studio 2022 or later
SQL Server
What is JWT?
Before we begin, let’s take a quick look at what JWT is.
JWT, or JSON Web Token, is a compact, URL-safe means of representing claims to be transferred between two parties. It consists of three parts: a header, a payload, and a signature.
Header: This typically consists of two parts: the type of token (JWT) and the signing algorithm being used (such as HMAC SHA256 or RSA).
Payload: This contains the claims, which are statements about an entity (typically, the user) and additional data. There are three types of claims: registered, public, and private claims.
Signature: This is used to verify that the sender of the JWT is who it says it is and to ensure that the message wasn't changed along the way.
JWTs are commonly used for authentication and authorization in web applications. When a user successfully logs in, a JWT is generated and sent to the client. The client then includes this token in the header of subsequent requests, allowing the server to verify the user's identity and grant access to protected resources.
Here’s an example of an JWT token.
eyJhbGciOiJIUzI1NiIsInR5cCI6IkpXVCJ9.eyJzdWIiOiJqb2huZG9lQGV4YW1wbGUuY29tIiwianRpIjoiYTBlYjYyMzUtNmJkNS00M2ZiLWFkODktM2Y4YmI5YzM0YjRmIiwiZXhwIjoxNzE3MTU3NDQ2LCJpc3MiOiJBcHB0cyIsImF1ZCI6IkFwcHRzIn0.y1mwdd2BiDzyVEJa5KnDeXLG8a3q60QAiONVy_YImdsAlthough it looks like gibberish, it isn’t. It encrypts and securely transmits information between parties as a JSON object, ensuring data integrity and authenticity. We can use a tool like jwt.io to decode it.

The decoded JWT is divided into three main sections:
Header: This section specifies the algorithm used for signing the token and the type of token. In this example, it shows:
{
  "alg": "HS256",
  "typ": "JWT"
}alg: The algorithm used for hashing, in this case, HS256 (HMAC with SHA-256).typ: The type of token, which is JWT.
Payload: This section contains the claims or the data. Here is an example payload:
{
  "sub": "johndoe@example.com",
  "jti": "a0eb6235-6bd5-43fb-ad89-3f8bb9c34b4f",
  "exp": 1717157446,
  "iss": "Appts",
  "aud": "Appts"
}sub: Subject, typically the user or principal of the token, in this case, an email.jti: Unique identifier for the token.exp: Expiration time of the token (in Unix epoch time).iss: Issuer of the token.aud: Audience for whom the token is intended.
Verify Signature: This part is used to verify that the token has not been tampered with. The signature is created using the encoded header, payload, and a secret key. The process can be visualized as:
Now that we have an idea what JWT is, let’s move on with the tutorial.
Step 1: Create a New ASP.NET Core API Project
First, create a new blank solution and then add a new ASP.NET Core API project to it. Open Visual Studio and follow these steps:
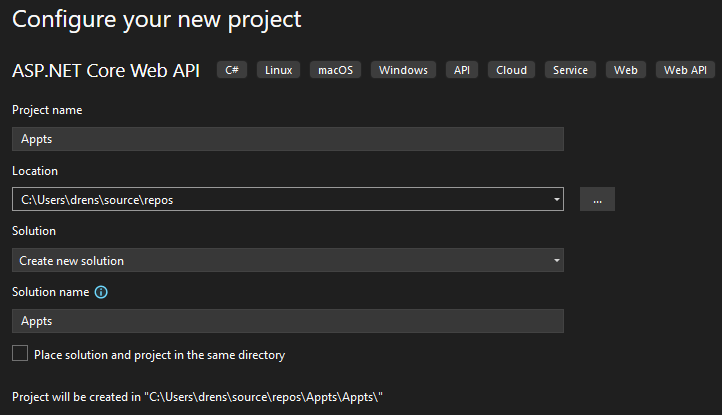
Go to
File -> New -> Project.Select
ASP.NET Core Web APIand clickNext.Configure your project name (I’ll use Appts
)and location, then clickCreate.
Select
.NET 8.0 (Long-term support)as the target framework and clickCreate.

Step 2: Install Necessary Packages
Next, install the following NuGet packages:
Microsoft.AspNetCore.Identity.EntityFrameworkCore: Provides Identity functionality using Entity Framework Core.
Microsoft.AspNetCore.Authentication.JwtBearer: Enables JWT Bearer authentication.
Microsoft.EntityFrameworkCore.SqlServer: Provides SQL Server database provider for Entity Framework Core.
Microsoft.EntityFrameworkCore.Design: Provides design-time tools for Entity Framework Core.
Install-Package Microsoft.AspNetCore.Identity.EntityFrameworkCore
Install-Package Microsoft.AspNetCore.Authentication.JwtBearer
Install-Package Microsoft.EntityFrameworkCore.SqlServer
Install-Package Microsoft.EntityFrameworkCore.Design
Step 3: Create the DbContext and ApplicationUser Class
Create a new ApptsDbContext class and an ApplicationUser class:
public class ApptsDbContext : IdentityDbContext<ApplicationUser>
{
    public ApptsDbContext(DbContextOptions<ApptsDbContext> options)
        : base(options)
    {
    }
}

public class ApplicationUser : IdentityUser
{
}DbContext: This is the primary class for interacting with the database using Entity Framework Core. It allows us to query and save data.
ApplicationUser: This class represents the user in our application and extends the IdentityUser class provided by ASP.NET Core Identity. This allows us to add custom properties to our user model if needed.
Like mentioned above, we’re inheriting from the IdentityDbContext class, which is essential for integrating the ASP.NET Core Identity system with Entity Framework Core in ASP.NET Core applications.
Step 4: Create the AuthController
Next, create an AuthController to handle user registration and login:
[ApiController]
[Route("api/[controller]")]
public class AuthController : ControllerBase
{
    private readonly UserManager<ApplicationUser> _userManager;
    private readonly IConfiguration _configuration;

    public AuthController(UserManager<ApplicationUser> userManager, IConfiguration configuration)
    {
        _userManager = userManager;
        _configuration = configuration;
    }

    [HttpPost("register")]
    public async Task<IActionResult> Register([FromBody] RegisterModel model)
    {
        var user = new ApplicationUser { UserName = model.Email, Email = model.Email };
        var result = await _userManager.CreateAsync(user, model.Password);

        if (result.Succeeded)
        {
            return Ok(new { message = "User registered successfully" });
        }

        return BadRequest(result.Errors);
    }

    [HttpPost("login")]
    public async Task<IActionResult> Login([FromBody] LoginModel model)
    {
        var user = await _userManager.FindByEmailAsync(model.Email);
        if (user != null && await _userManager.CheckPasswordAsync(user, model.Password))
        {
            var token = GenerateJwtToken(user);
            return Ok(new { token });
        }

        return Unauthorized();
    }

    private string GenerateJwtToken(ApplicationUser user)
    {
        var claims = new[]
        {
            new Claim(JwtRegisteredClaimNames.Sub, user.UserName),
            new Claim(JwtRegisteredClaimNames.Jti, Guid.NewGuid().ToString())
        };

        var key = new SymmetricSecurityKey(Encoding.UTF8.GetBytes(_configuration["Jwt:Key"]));
        var creds = new SigningCredentials(key, SecurityAlgorithms.HmacSha256);

        var token = new JwtSecurityToken(
            issuer: _configuration["Jwt:Issuer"],
            audience: _configuration["Jwt:Issuer"],
            claims: claims,
            expires: DateTime.Now.AddMinutes(30),
            signingCredentials: creds);

        return new JwtSecurityTokenHandler().WriteToken(token);
    }
}
The AuthController handles user registration and login, providing endpoints for these actions. We also have a helper method called GenerateJwtToken that generates a JWT token for authenticated users.
Step 5: Configure appsettings.json
Add JWT and database connection strings to appsettings.json:
{
  "Logging": {
    "LogLevel": {
      "Default": "Information",
      "Microsoft.AspNetCore": "Warning"
    }
  },
  "AllowedHosts": "*",
  "Jwt": {
    "Key": "Ek]3U@mFrhyhTu70FUB(yg!b.3j*/(FKzFKL+)[_RQvf?_6jdY",
    "Issuer": "Appts"
  },
  "ConnectionStrings": {
    "DefaultConnection": "Server=localhost;Database=ApptsDb;Trusted_Connection=True;TrustServerCertificate=True"
  }
}
Step 6: Configure Services in Program.cs
Update Program.cs to configure services and middleware:
using Microsoft.AspNetCore.Authentication.JwtBearer;
using Microsoft.AspNetCore.Identity;
using Microsoft.EntityFrameworkCore;
using Microsoft.IdentityModel.Tokens;
using System.Text;

var builder = WebApplication.CreateBuilder(args);

builder.Services.AddControllers();
builder.Services.AddDbContext<ApptsDbContext>(options =>
    options.UseSqlServer(builder.Configuration.GetConnectionString("DefaultConnection")));

builder.Services.AddIdentity<ApplicationUser, IdentityRole>()
    .AddEntityFrameworkStores<ApptsDbContext>()
    .AddDefaultTokenProviders();

builder.Services.AddAuthentication(options =>
{
    options.DefaultAuthenticateScheme = JwtBearerDefaults.AuthenticationScheme;
    options.DefaultChallengeScheme = JwtBearerDefaults.AuthenticationScheme;
})
.AddJwtBearer(options =>
{
    options.TokenValidationParameters = new TokenValidationParameters
    {
        ValidateIssuer = true,
        ValidateAudience = true,
        ValidateLifetime = true,
        ValidateIssuerSigningKey = true,
        ValidIssuer = builder.Configuration["Jwt:Issuer"],
        ValidAudience = builder.Configuration["Jwt:Issuer"],
        IssuerSigningKey = new SymmetricSecurityKey(Encoding.UTF8.GetBytes(builder.Configuration["Jwt:Key"]))
    };
});

var app = builder.Build();

// Configure the HTTP request pipeline.
if (app.Environment.IsDevelopment())
{
    app.UseDeveloperExceptionPage();
}

app.UseHttpsRedirection();

app.UseAuthentication();
app.UseAuthorization();

app.MapControllers();

app.Run();
In this step, we configured the necessary services and middleware for our application. We set up the DbContext for Entity Framework Core to use SQL Server, configured ASP.NET Core Identity for user management, and added JWT authentication.
We also ensured that the authentication and authorization middleware are used in the request pipeline. This setup enables our application to handle user registration, authentication, and protect endpoints using JWT tokens.
Step 7: Add Migrations and Update Database
Now that we have our DbContext and Identity setup, we need to create the database schema. This involves adding a migration and updating the database. By doing this, the necessary tables for Identity and our application will be created in the database.
Run the following commands in the Package Manager Console:
dotnet ef migrations add Init --project [PUT YOUR PROJECT NAME HERE]This command creates a migration named Init in your project. The migration file will contain code to create tables such as AspNetUsers, AspNetRoles, AspNetUserRoles, and others needed for Identity.
dotnet ef database update --project [PUT YOUR PROJECT NAME HERE]This command applies the migration to the database. It will create the necessary tables for user authentication and any other defined entities in your DbContext.
Step 8: Secure the WeatherForecast Controller
Finally, secure the WeatherForecast controller by adding the [Authorize] attribute. This attribute ensures that only authenticated users can access the endpoints in this controller.
    [Authorize]
    [ApiController]
    [Route("[controller]")]
    public class WeatherForecastController : ControllerBase
    {
        private static readonly string[] Summaries = new[]
        {
            "Freezing", "Bracing", "Chilly", "Cool", "Mild", "Warm", "Balmy", "Hot", "Sweltering", "Scorching"
        };

        private readonly ILogger<WeatherForecastController> _logger;

        public WeatherForecastController(ILogger<WeatherForecastController> logger)
        {
            _logger = logger;
        }

        [HttpGet]
        public IEnumerable<WeatherForecast> Get()
        {
            var rng = new Random();
            return Enumerable.Range(1, 5).Select(index => new WeatherForecast
            {
                Date = DateTime.Now.AddDays(index),
                TemperatureC = rng.Next(-20, 55),
                Summary = Summaries[rng.Next(Summaries.Length)]
            })
            .ToArray();
        }
    }
Adding the [Authorize] attribute restricts access to the WeatherForecast endpoints, requiring a valid JWT token for access.
Testing the API
Now that we've secured the WeatherForecast controller, let's test the implementation to ensure everything works as expected.
Start the application
Run your application to start the web server.
Register a new user
Use a tool like Postman or curl to send a
POSTrequest to/api/auth/registerwith a JSON payload containing the user's email and password.
{
    "Email": "test@example.com",
    "Password": "Password123!"
}
Log in
Send a
POSTrequest to/api/auth/loginwith the same email and password.
{
    "Email": "test@example.com",
    "Password": "Password123!"
}
If the credentials are correct, you should receive a response containing a JWT token.
Access a protected endpoint
Send a
GETrequest to/weatherforecastwith the token included in theAuthorizationheader.
Authorization: Bearer <Your-JWT-Token>If the token is valid, you should receive a response with the weather forecast data. If the token is missing or invalid, you should receive an unauthorized error.
Here’s an example using Postman.

Conclusion
In this blog post, we walked through setting up JWT authentication in an ASP.NET Core API. We covered creating a new project, configuring services, securing endpoints, and testing the API. With JWT authentication in place, your API is now more secure and ready for use in real-world applications.